Quick Start With S2ENGINE HD 1.4.0 – part 3
Today we will show how to import a static model from external packages, how to assign it to a scene object and how to save object configuration for re-using it.
In the tutorial we will refer to the model barack.dae that is furnished with the BASIC license package. TRIAL users can find it here
This is a collada (.DAE) file containing 4 LOD versions of a barack model. All models are placed in the same position/orientation at the center of the coordinate system.
Every Model is composed by a single mesh with multiple materials.
NOTE that the materials of all the 4 lods are the same (same name, same textures). This is important for S2ENGINE HD to right associate the corresponding surfaces of the different level of details.
To import models, as in previous versions, you must push the import… menu item as showed in the following image:

A file dialog will appear that lets you to choose the file to import. In our case the file is barack.dae.
NOTE that in this version files to import can be located everywhere you want.

After choosen the file click on Open.
The import dialog, showed in the following pitcure, will appear. It lets you to set some import related params. Lets see major settings:

- MaterialsFolder: this is the folder in which materials of the model will be placed
- TexturesFolder: this is the folder in which textures of the model will be placed
- ModelsFolder: this is the folder in which the model will be placed
- AnimationsFolder: this is the folder in which animations of the model will be placed (in the case you check importAnimations flag)
- flipWinding: check this if you want to invert the facing of model triangles.
- rescale: scale factor of the model (values different from 1 let you to modify model dimensions)
- importGeometry: check this if you want to import geometry
- importAnimations: check thisd if you want to import animations.
you can play with other minor params basing on your needs.
In the 1.4.0 version we have added a new feature to the import dialog.
When the model file to import is scanned the system check if materials contained inside it are just present into the destinations directory (MaterialsFolder), if they already exists you can choose to replace them or not: if you want to replace a material simply select it.
Click on import when ready.
When importing the model the engine creates folders as specified inside the folder params, if the folder specified is the same for all types (models, materials, animations and textures) all files are placed in the same folder. This is our case where all model resources are placed inside the barack folder.
Our project folder now looks like this:

In barack there are all model resources.
Inside the editor you will see all resources in the project manager tool by clicking on the textures, materials, models, related vertical icon tabs.
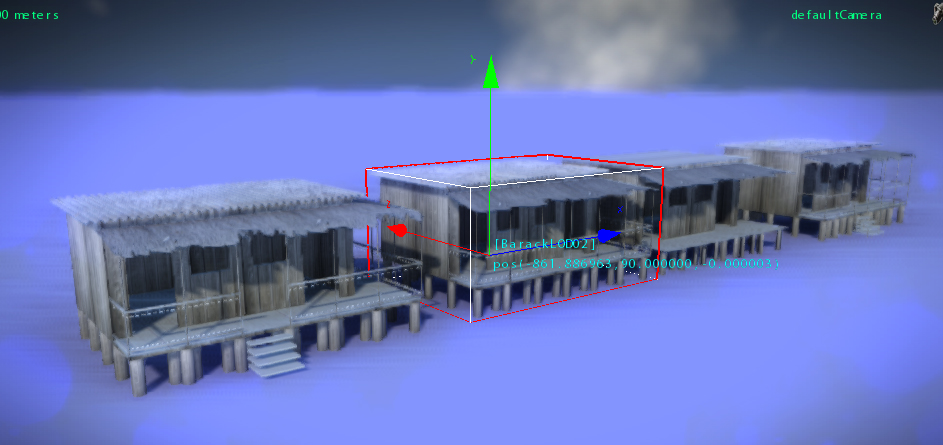
The imported model is showed into the following image:

NOTE that materials haven’t particular settings, they have only diffuse texture specified.
This is due to the fact that inside the DAE source file we have specified only one texture per material. We can modify materials adding the normal or settings flags like alphaTest or DoubleSided inside the MaterialsEd tool.
Lets see how to do so.
Click on the MaterialsEd icon as showed into the image below:

The material viewport will appear.
Click on scene tab to return to scene viewport and select the object by clicking on the material you want to edit:
You will see materialEd tool on the right changing textures as the one owned by the selected material as showed in the following image:

The first tab of the materialEd lets you to configure material layers. Material layers are similar to terrain layers: you can set diffuse and normal textures, glossisness and texture coordinate tiling either for diffuse and normal texture.
If you want to modify other general parameters of the material you have to choose the last tab, this will show you material props:

In our case we are checking the alphaTest and twoSided flags of the Tatched roofs material.
As said the source DAE file contains 4 model corresponding to 4 Level of details of the same model.
When imported all models have the same origin coordinates.
To see them separated select the object tool tab and click on the translate icon, then select the model and translate it away.
You will see all 4 models as showed in the following pitcure:

Well,
now we delete all models from scene except the more detailed, that we will use as main model mesh lod: select the model to delete and click on Del keyboard button.
How to assign the Lods to the remained object?
Take a look to the object class params: select the object and click on the class Tab.
You will see something like that in the image below:

NOTE that Lod1,Lod2 and Lod3 params are empty. They must contain file path for the corresponding lod level models.
Take a look to the barack models inside the project manager as showed in the following image: We are inside the barack folder of the models tab of the project manager tool.

To assign these to the barack scene object select one of these model icon and drag it on the object in the scene, a popup menu will appear: select the corresponding Lod param as showed in the puicture below:

Repeat this process for every lod model until we have filled all lod params as showed into the following pitcure:

S2ENGINE HD render system automatically choose the best LOD to apply to the object basing on the max distance the object is visible.
By default the maxDistance object param is set to -1 which means infinite distance.
In our case we must set a finite distance in order to let engine using LOD system, as showed in the last image:

Remember that S2ENGINE HD units system uses centimeters so a distance value of 15000 means 150 meters.
Now that we have configured our object we can save its configuration in order to have the possibility to placing in the scene other objects with same params configuration with a simple drag and drop procedure.
Lets see how to do.
Select the object in the scene. Then select the objects tab in the project manager tool as showed in the image below:

We see the barack folder.
Select it and, when inside, right mouse click: a popup menu will appear, select the New File item as showed int the following image:

The pick object dialog will appear. Select the object on the right side and then click on the right-to-left arrow as showed into the picture below. The object name will appear on the right, click Ok.

The engine will save the object configuration and put it into the barack folder: you will see the object configuration preview icon appearing into the barack folder. As default the filename is new.cfg but you can modify it by right click on the file icon and choosing rename.

Now that you have saved the object configuration you can drag and drop it into the scene every times you want placing more than one barack.
Ok guys, that’s all for now.
Next tutorial we will see how to import characters and animations.
Enjoy the article and Stay tuned!
No Comments