Quick start with S2ENGINE HD 1.4.0 – part 1
In this tutorial I’ll show you how to create a new project and starting to develop it.
First click on “NewProject…” button in the “File” menu, as showed into the following image.

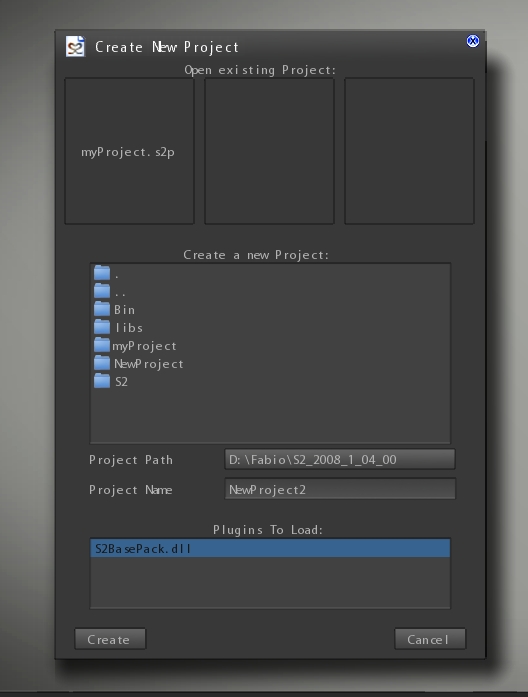
A new dialogbox will appear. It will let you to open an existing project, by clicking on one of the 3 file thumbs on the top, or creating a completely new project. NOTE: IN TRIAL version the “new project dialog” cannot be selected from menu BUT it appears just when editor starts.
To do this you have to choose the folder in which put your project.
Now give your project a name by writing in into the “Project Name” input box.
NOTE: When S2ENGINE HD creates the project it creates a new folder with the same name you have given to you project, in this folder all project assets will be put.
Starting from 1.4.0 version when you place an object into a scene the engine requests the plugin containing the class the object belongs to. For now the only plugin available is S2BasePack.dll so when you create a project you have to select this plugin in order to make editor using it when working with the project. To select the plugin simply click on its name in the plugins to load list.
Now you can click on the Create button to create your new project.

When created the project is empty, so you see nothing into the Project Resources tool. The first thing you have to do now is create a new scene.
Click on the “New…” icon as showed into the following picture.

The “Create new scene” dialogbox will appear. As for the “Create New Project” dialogbox It lets you to choose an existing scene or creating a completely new one.
As showed into the following image:

To create a new scene insert the scene name into the “Scene Filename” inputbox (and press enter).
Every scene must have a limited volume you have to specify before creating it. In the example before we created a scene extended for 1000×1000 meters. To specify scene dimensions write them into the Dims inputbox.
NOTE: These measures must be inserted in centimeters (1000 meters = 100000 centimeters) the Engine will show you automatically the measure in meters.
Now you can create the scene by clicking on the Create button.
If you want to build an open scene, maybe you would like to create a terrain into the scene.
To do so click on the CreateTerrain icon as showed into the following image:

The CreateTerrain dialogbox will appear:

As in previous version of the engine the following are parameters of the terrain creation:
- Name: Input box that must contains the name of the terrain material you want to create. When terrain is created a new material is also created into the Materials/Terrains/ folder.
- Terrain Dims: this combo box lets you to set the world dimensions (expressed in Kilometers) of the terrain. Available dimensions are 8×8,4×4,2×2,1×1,0.5×0.5.
- Heightmap res: the resolution of the heightmap. Bigger the resolution more terrain details you obtain. Note that this implies also more used system and graphics memory
- VgMap Res: Vegetation Map resolution. Vegetation map (see below) is a map containings information about where are placed the objects of a given vegetation layer. More high is this resolution more precisely you can place vegetation on the terrain. The vegetation map uses exclusively system memory But it must be also set carefully preventing out of memory problems.
- Mask Res: This is the resolution of the Terrain textures layer mask and of the terrain colour map. It consumes more memory (expecially graphics memory) than all the other maps and it is responsible of the terrain texture splatting. Bigger the resolution more details you can paint on the terrain.
Once you have set parameters for your terrain you can click on the create button to place the new terrain into the scene.
As showed in the following image the terrain will look just like a violet plane.
You will be able to sculpt it using the terrain tool that can be accessed by clicking on the terrain icon as showed into the picture.

Ok guys, that’s all for now.
In the next part I will show how to using all the terrain tools for terrain sculpting and vegetation creation in the new S2ENGINE HD 1.4.0.
Comments: 5
Magnificent
I enjoyed reading the topic, and i hope next time will use video,because that will be perfect.
alos i want to know what is the defferent between 1.03.00
& 1.04.00 ?, what make 1.04.00 better ?
thank you
Good to see things are moving ahead Fabio,thanks
My opinion is the video for editor tutorial & book (PDF) for programming tutorial
Hopefully that’s help you 🙂
S2ENGINE is best for unity 3d
S2 engine на много лучше Unity 3D. Двигатель намного мощнее да и глюков намного меньше чем у юньки.