Objects tool is designed for easily managing/editing objects inside the scene. It is showed just at start but it can be also showed by selecting Tools->Objects on main menu or by clicking on icon
Creating objects
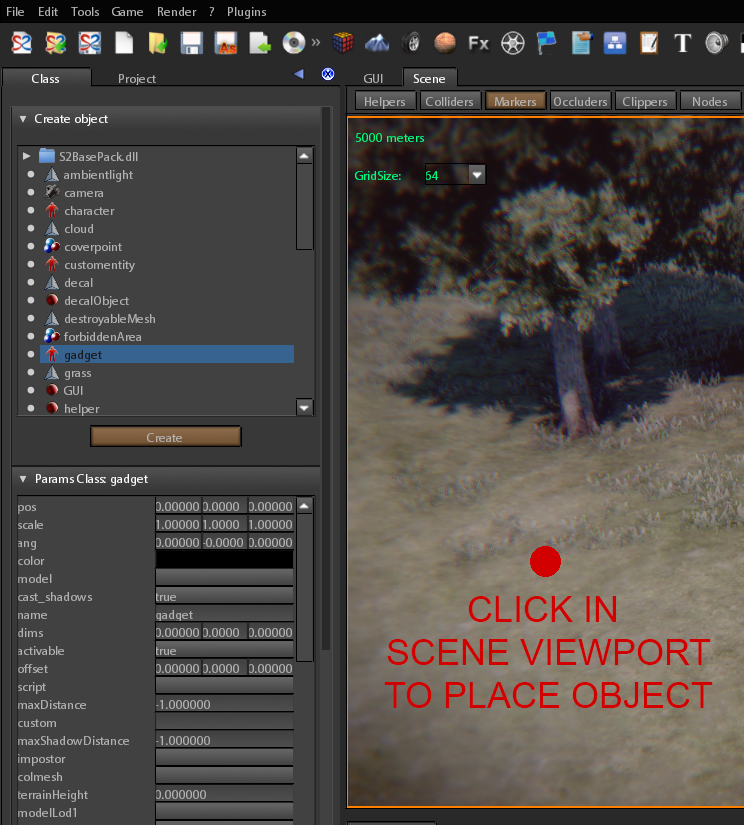
Object can be created from scratch by using the ClassInspector tool.
- Click on Create check button and then select the class you want for creating the object
- Then you can set the class parameters of the object before creating it, as initialization
- Finally you can click on the SceneViewPort where you want to place the object
- You can repeatedly create objects by clicking into the scene as long as Create check button is enabled
- Attention
- Once you have create and placed object inside scene CLICK AGAIN on Create button for disabling creation phase
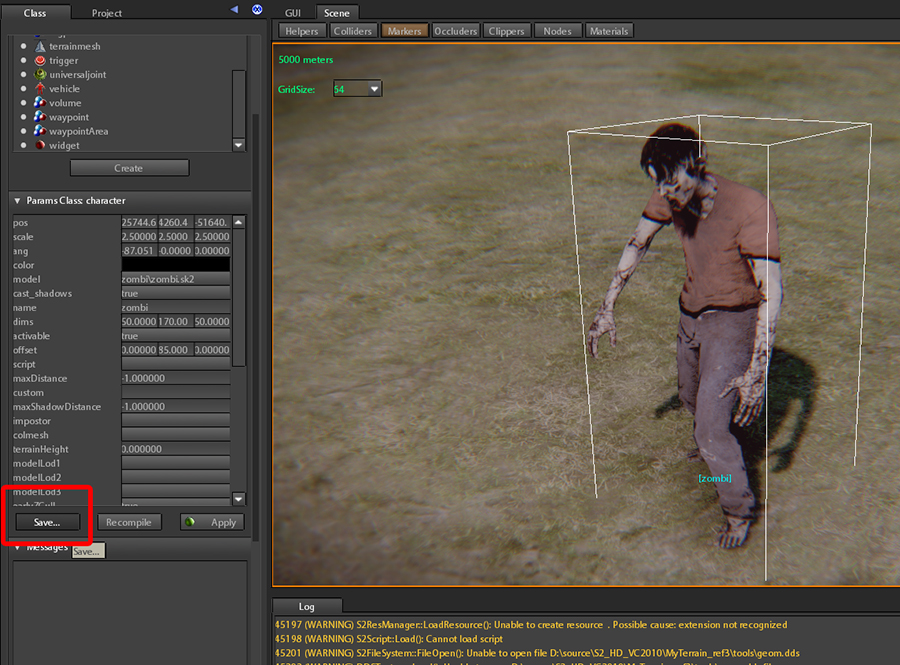
Saving objects
First Select the object to save.
Then there is more then one method for saving objects.
- One is by creating new Prefab or refreshing existing one (see PrefabsInspector)
- Another method is by clicking Save... button inside ClassInspector as showed into the following image
The file dialog appears, so
- Choose the folder in which to save the object,
- Choose the name of the file you want to save
- Finally click on save, as showed in the following image
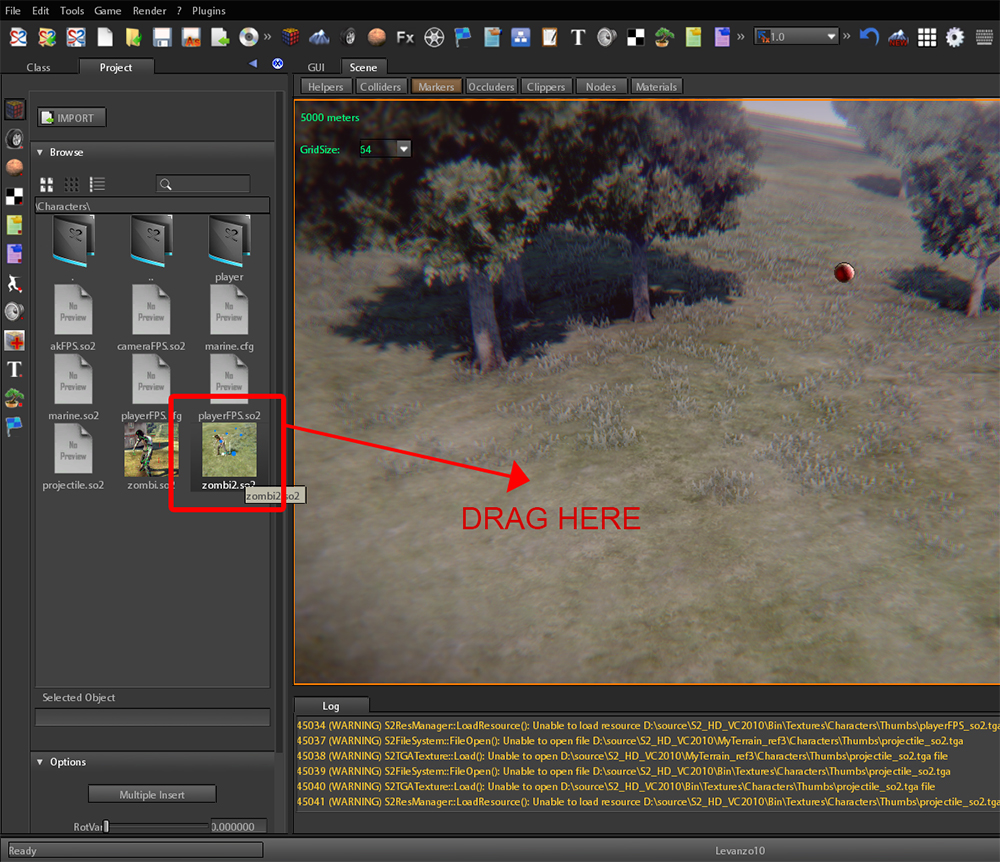
Placing Objects
Already created (and saved) objects can be placed into the scene from Prefab browser. Select the object you want to place from the browser and drag it into the scene, as showed into the following image
If you keep pressed the mouse button after drag the object into the scene you can decide the best position in which placing it, the object position will be computed by projecting it on the terrain and/or other placed object surfaces
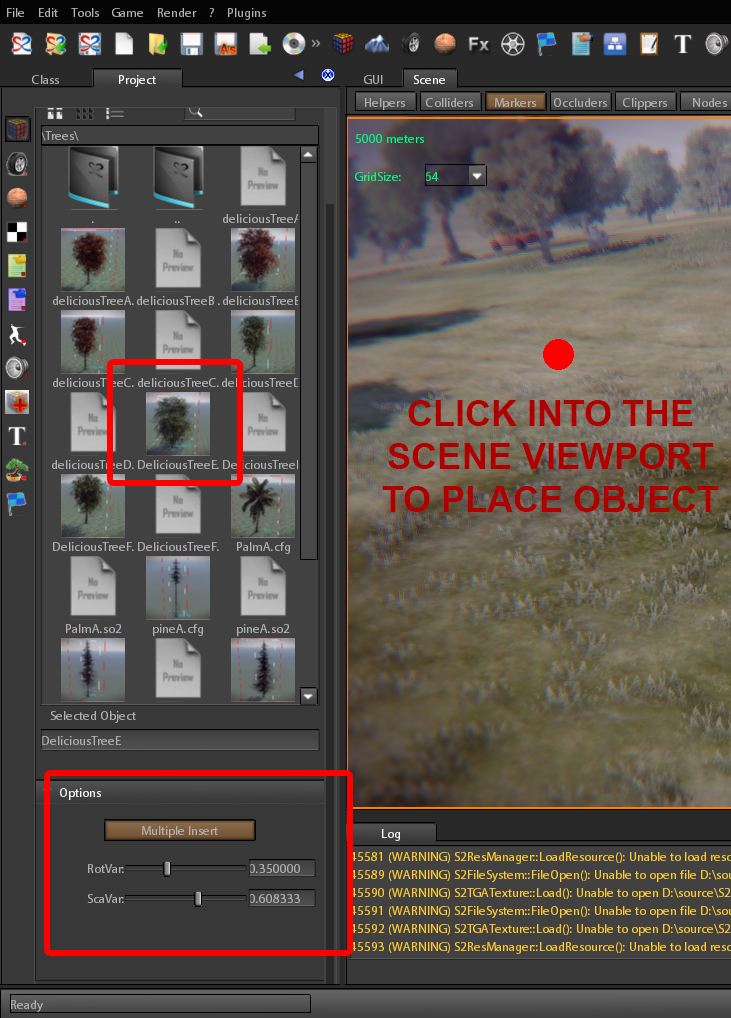
Advanced object placement
There is a special method for placing object into the scene. It is used especially if you want repeatedly place the same object with different orientations and scales.
- Select the object you want to place from the Prefabs browser
- Click on the MultipleInsert check button
- Choose RotVar and ScaVar values
- Click inside the scene viewport
- Attention
- Once you have create and placed all objects you want inside scene CLICK AGAIN on MultipleInsert button for disabling Advanced placing method.
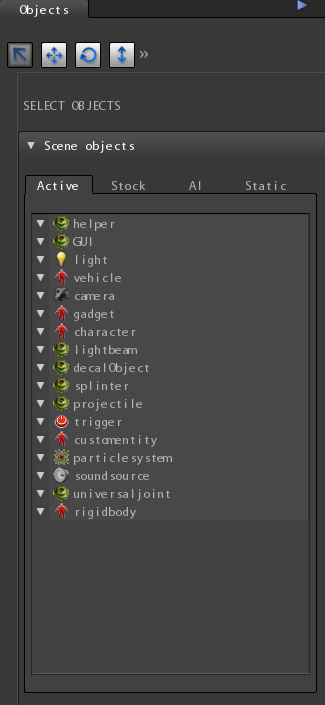
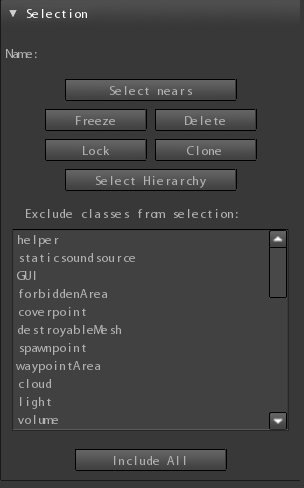
Objects selection
The objects tool is useful for managing objects in the scene. It contains 4 tabs that respectively lets you to select,translate, rotate and scale objects. Object can be selected using the select tab but also clicking directly on the object in the scene. More than one object at time can be selected: holding CTRL key you can add/remove object from the selection bunch, either clicking in the scene viewport or clicking directly in the selection tab. Also you can select multiple object in the scene by holding mouse button and move mouse, in this case a quad is drawed on the screen and every object inside it is selected.
You can select objects when you have pressed on one of the 4 tabs.
- Attention
- You also can press SPACEBAR key to switch between tabs.
In the case of translate,rotate,scale tabs a gizmo is showed that lets you to directly translate, rotate, scale the object on one of the 3 axis.
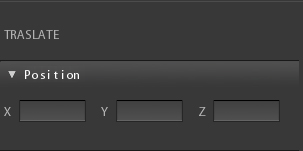
Translate
When you select this tab the selected object can be translated, either moving its gizmo inside the scene or editing position input boxes (remember to press return key to apply changes). There is a way to fast translate an object directly in the scene: click on the object, holding left mouse button and move. In this case the object position is moved as the projection, on the scene, of the position of the mouse cursor on the screen.
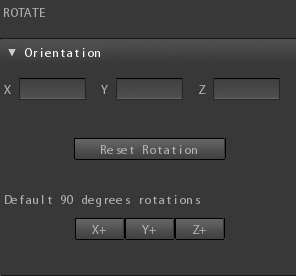
Rotate
When you select this tab the selected object can be rotated, either moving its gizmo inside the scene or editing rotate input boxes (remember to press return key to apply changes). For fast rotating an object you can also use the 90 degree rotations respectively on X+, Y+, Z+ axis.
Scale
When you select this tab the selected object can be scaled, either moving its gizmo inside the scene or editing position input boxes (remember to press return key to apply changes).
Select
Select tab lets you to select object basing on their class and their type.
In S2ENGINE HD scene objects are distinguished in 4 types, pushed into 4 distinct lists, basing on their use inside the game simulation.
- Stock: Stock object are inactive objects. They do not make anything unless they are activated. They have to be explicitly activated by script or by object internal C++ code when needed. This fact is useful when you must make objects like projectiles, decals, explosions, etc. Projectiles are activated only when gun shoots, decals are activated only when projectile impacts the wall, etc. So in the definition of the scene these object are defined only once, then they are duplicated and activated when it is needed. To make an object NON-Active you have to set false its activable param, in this case you will see it inside the Stock list, if you set activable param to true the object is moved into the Active list.
- Active: Stock objects are ‘sleeping‘ objects, they do not move, they are not pushed into the scene, they do not help the AI system. They do not make anything. To make something a stock object must be ACTIVATED. When an object is activated it is duplicated, initialized (its model is loaded, the initialization script block is executed, animation script is loaded, etc.) and finally pushed into scenegraph. Active objects are objects that are activated just when a simulation start (after loading a game level, or restarting it). They are updated during the main game loop at every frame unless they are sleeping. Active Objects Transformation matrix is also updated at every frame unless you reset the moved flag at the end of Update() or PostUpdate() function. To make an object Active you have to set true its activable param.
- AI helpers: These objects are just helpers used mainly by the AI subsystem. They are, for example, waypoints, but also areas or volumes. They do not move but can have associated script, like in the case of cover points. These object are not pushed inside the scenegraph (so they are not visible during game simulation), they do not move, they are only logic.
- Statics: These type of object are pushed into the scenegraph but do not move during game simulation, however they can be linked to moving objects. For example a static light can be attached to a physics vehicle. Generally they haven’t associated script (their behavior is null) but some of them, like destroyable meshes, can receive messages that can be processed by a script. Unlike Active Objects they aren’t updated during the main game loop.
When you create a new object or drag an object into the scene it is automatically pushed into the corresponding list and corresponding class. Clicking on the class item a list you will see all instanced objects of that class.
- See also
- Objects
Advanced object selection
Each of described tabs lets you to do some operation on selected objects using advanced selection.
- Select nears: lets you to select objects near to a previously selected object
- Freeze: lets you to freeze/unfreeze the selected object
- Delete: lets you to delete selected object
- Lock: lets you to lock the selection. In this case you will move, rotate, translate only the selected object, without the possibility to select other object (useful to avoid selection mistakes)
- Clone: clone the selected object.
In addition you can restrict the range of objects that can be selected by using the “Exclude classes from selection:” list. This is useful when, for example, you want to select a bunch of objects of the same class avoiding erroneous selection of other objects .


 1.8.10
