Import an old scene into new project
In this tutorial I’ll show how to import a scene made with old S2ENGINE HD 1.03.00 version inside a project created with S2ENGINE HD 1.4.0.
Suppose you have already created a new project (read this article to know how to do), and you have already copied all files of your scene from previous installation of the engine inside the standard engine folders (textures, materials, scenes, models, etc..) of the new installation (NOTE that this is the standard procedure you must do to copy a scene of an engine installation into another UNTIL the new 1.4.0, where you can use projects).
How to import into the project the scene you created with previous 1.03.00 engine version?
Pratically you have first to create (we say “publish“) an asset of the scene (a folder containing all the scene resources) and then import it into the project.
Let’s see how to do this in detail.
Select the scene browser inside the project tool as showed into the following pitcure:
then click right mouse button on the icon of the scene you want to publish: a popup menu will appear (see the picture below).
Click on “Publish…“. A file dialog will appear: choose a folder inside to put the published scene, insert the name of the scene asset to create (and press ‘enter’) as showed into the image.

Now click on “Publish” in the file dialog: the engine will create a new folder (in this case named “NewScene” and it will put all scene resources inside it.
Finally we have converted the scene into an asset, now open a previously created project: we want to import the scene into the project.
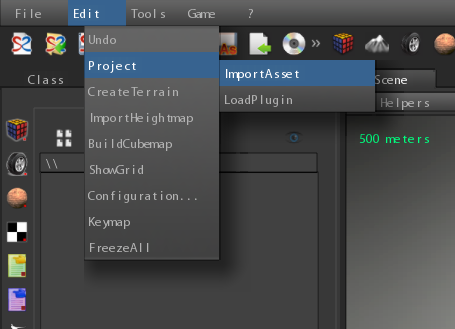
Well, click on the the Edit menu and select Project->Import Asset (see the picture below).

A file dialog will appear: choose the folder of your scene.
NOTE than when you import assets you can choose a file BUT ALSO an entire folder. In our case we have to choose the an entire folder so click on the scene folder, as showed in the next picture, in order to see want is inside and then click on Open.

Voilà, the project browser will fill with all scene resources, the scene is imported.
The beauty of this procedure is that it can be applied with all type of asset/file, not only scenes. So you can publish models (in this case the engine will create a folder inside placing the model but also all textures and materials used by the model), objects (so the engine will create a folder inside placing all models, scripts, textures, materials, animations used by the object), and so on… and then import them as assets as showed in the article.
That’s all for now guys.
Stay tuned…
No Comments