S2ENGINE HD  1.4.6
Official manual about S2Engine HD editor and programming
Models
modelTool05.jpg

Models tool is useful to apply some operations on models such as:

  • Add/remove/modify model nodes,
  • add/remove animations,
  • add/remove/edit physics/collision geometry,
  • edit vertices and normals.

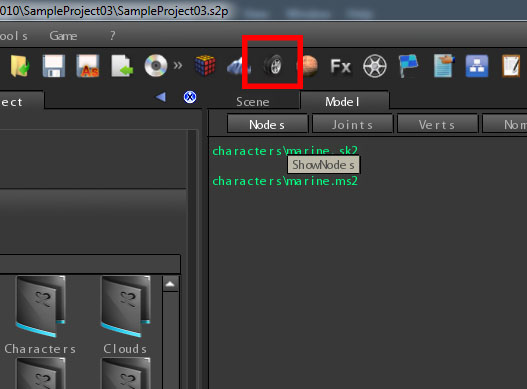
To open the model tool click on the models icon as showed in the following image:

modelTool01.jpg

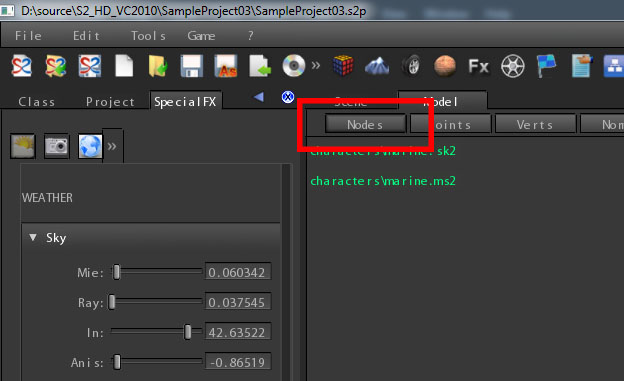
As showed in the following image the models tool is composed by 3 panels:

  • Model View: View that shows the model.
  • Model edit panel: the main panel where you can add/remove/edit all features of the model.
  • Animation tracks panel: Here you can manage model animations
modelTool02.jpg

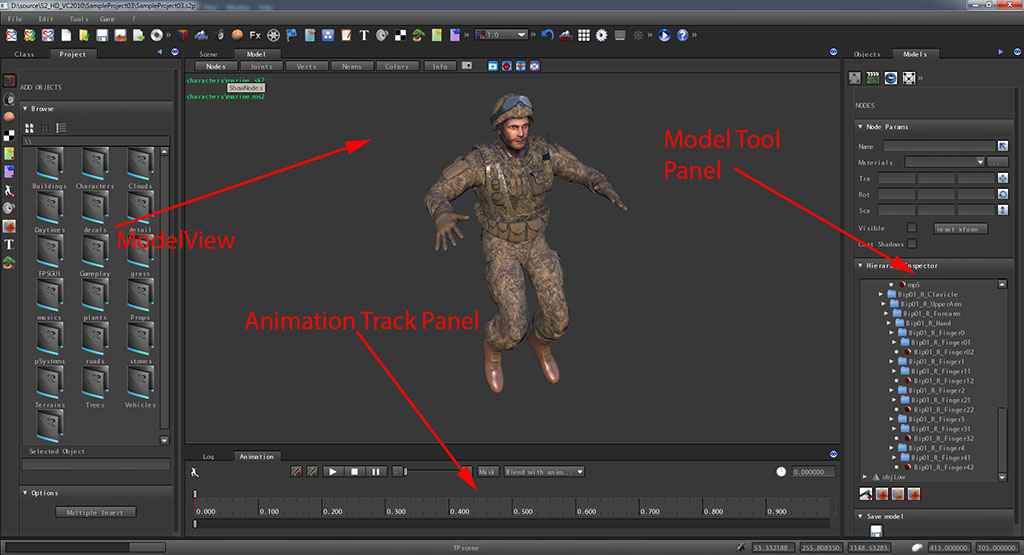
These 3 models tool panels and independent. You can hide, close, move them independently basing on your needs. For example you may want to switch to SceneView while maintaining the model edit panel.

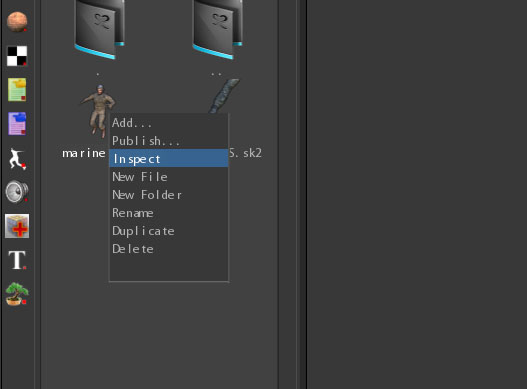
When you want to view and edit a model with models tool you have 3 possibilities:

modelTool06.jpg
Drag&drop the model icon from models browser into ModelView


modelTool04.jpg
Click right mouse button on model icon inside models browser and click on inspect


modelTool07.jpg
If an object instance into the scene owns the model, and you have already opened the models tool, you can directly select the object in the SceneView


Nodes

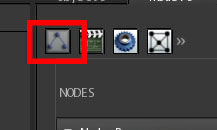
To show nodes tool click on the Nodes icon of the Model Tool panel as showed into the following image

modelTool15.jpg

Nodes are the basic components of a model. They can be of 2 different types:

  • Bone node: a node of a skeleton, it hasn’t drawable geometry but can own joint capsule for collision detection. in the hierarchy inspector they are marked with folder icon if have child's or with red ball icon if they are leafs.
  • Geometry node: a node containing a rigid mesh or a deformable skin. In the Hierarchy inspector they are marked with a grey solid triangle icon.

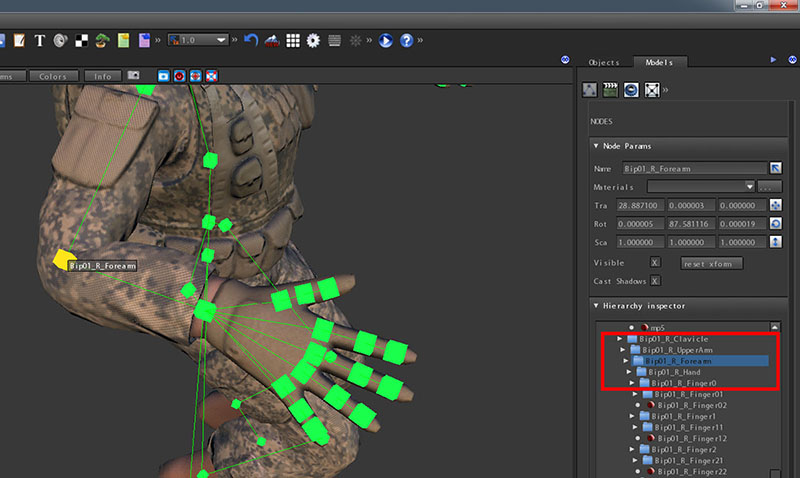
To show nodes of the model inside the ModelView click on Nodes button as showed in the following image. NOTE THAT only bone nodes are showed:

modelTool08.jpg

Nodes are drawed as Green cubes connected with green lines. You can select a model node in 2 ways:

  • by clicking directly on the green cube
  • by clicking on an item of the nodes list of the Hierarchy Inspector.
modelTool09.jpg

When you select a node of the model you can do some operation on that node:

  1. Change its name by editing the Name input box
  2. If it is a geometry node you can change its materials by clicking on the Materials combo box
  3. Translate it by checking the translate icon
    modelToolIcon01.jpg
  4. Rotate it by checking the rotate icon
    modelToolIcon02.jpg
  5. Scale it by checking the scale icon
    modelToolIcon03.jpg
  6. Show/hide it by checking Visible box (if it is a geometry node)
  7. Make it cast shadows by checking the Shadows box (if it is a geometry node)
  8. If the model is a single mesh model (only one node) you can also use the Reset Xform button that collapse node transformations

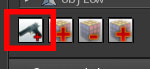
Other special operations can be made on the nodes of a model hierarchy using hierarchy inspector buttons:

  • modelTool10.jpg
    Add item : Lets you to load an additional model and add it to the current selected node.
    Attention
    NOTE that IN THIS VERSION this is only used as reference for best posing the node, it isn’t used for adding new features to the model
  • modelTool11.jpg
    Add new node : add a node as child of the current selected node.
  • modelTool12.jpg
    Delete node : delete the current selected node.
  • modelTool13.jpg
    Add parent node : add a node as parent of the current selected node.

ModelScript and Animations

When import a model animation it is not automatically applied to the model: you have to add it manually using the animations tool tab.
When a model is opened in Model Tool it is automatically created a resource called ModelScript (.ms2) that contains information about all animations the model can play, the definition of keyframes and animations masks. All that data is created and stored by using Animations tool tab.

Warning
Modelscript is a resource file, once defined it must be linked to the object containing the model that can play referred animations. Many objects have modelscript parameter, so you can link it by using ClassInspector or prefabInspector.
modelTool26.jpg
without modelscript an object cannot play animations

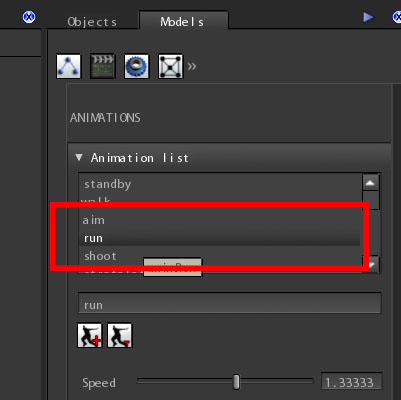
To show animations tab click on the Anims icon of the Model Tool panel as showed into the following image:

modelTool14.jpg

Animations (so Modelscripts) are managed using

Animations tool tab

modelTool24.jpg
  1. List of animations currently added to the model
  2. Add new animation, delete existing animation
  3. Set animation speed. If speed is negative, animation is reversed
  4. Animation mask list. You can add/remove masks
  5. Start node of the mask
  6. List of mask end nodes
  7. List of nodes excluded from the mask

Tracks panel

modelTool23.jpg
  1. Currently selected animation name
  2. Add/ remove animation key frame
  3. Apply masking on the currently playing animation model and blend the current animation with another using the mask (it is used to view the effect of a created mask)
  4. Play, Stop, Pause of the current selected animation. If the animation is in pause you can change the timeline and view the effects on the model, if animation is stopped no effect are showed.
  5. Timeline Zoom
  6. Timeline scroll
  7. Timeline thumb. Drag it for changing the animation current time
  8. Current animation time. NOTE that animations are normalized,so the animation time goes from 0 to 1.

Add animation

To add a new animation compose the name you want the animation must have into the inputBox showed in the picture below:

modelTool18.jpg

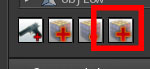
Then press on the AddAnim button as showed in the next image:

modelTool19.jpg

The animation browser dialog appears. Choose the animation you want to apply to the model (usually you find it into the folder you have specified before importing).

modelTool20.jpg

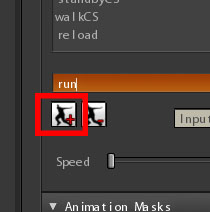
The animation will be added to the Animation list box: you will see the animation name you have specified in the list box. Then, to see the animation applied to the model select it from the Animation list (by clicking on the name) as showed in the next image:

modelTool21.jpg

Now you are ready to play the animation and see it on the model. Click on the Play button of the animation track panel as showed in the image below:

modelTool22.jpg

Edit Animation Keyframes

Animations can have some frames marked as key. When an animation is performed the animated entity sends a message to itself when a keyframe is reached.

The name of the message is: AnimTime.

The elements of content of the message are:

  • Name of the playing animation containing the keyframe.
  • Progressive index of the reached keyframe (for example if you have a walk animation at index 0 will be the first step and at index 1 will be the second step).
  • The weight of the animation
  • Number of the playing channel

Then you can process the message inside the Message() function of the script associated to the animated entity. To add a keyframe to an animation, you have to use the Tracks panel:

modelTool25.jpg

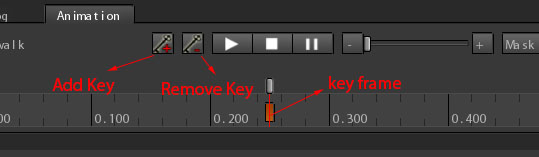
Place the timeline thumb on the time you want to add the keyframe. Click on the AddKey button.

Animation Mask

Physics Joints

Vertex Editing