|
S2ENGINE HD
1.4.6
Official manual about S2Engine HD editor and programming
|
|
S2ENGINE HD
1.4.6
Official manual about S2Engine HD editor and programming
|
GameMachine is a tool specifically designed for visually programming game objects logic and animations.
It is based on the concept of Finite State Machine (FSM): every state is represented as a node of a diagram and is a collection of successive Actions, nodes are connected trough lines representing transitions from a state to another, every transition is triggered by Events. Just as all other tool GameMachine can be accessed by clicking on an icon of the main toolbar:
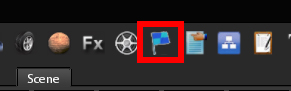
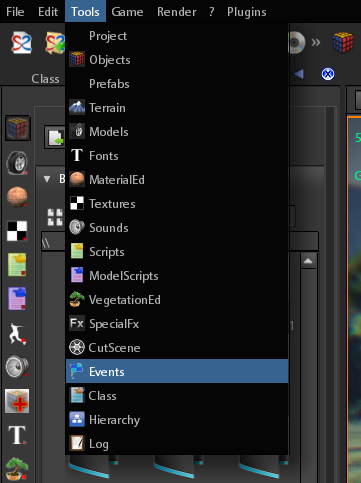
Or by clicking on Tools->Events on the main menu
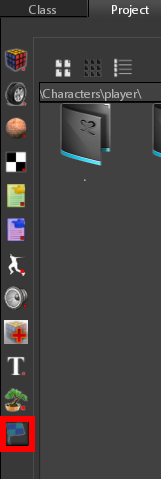
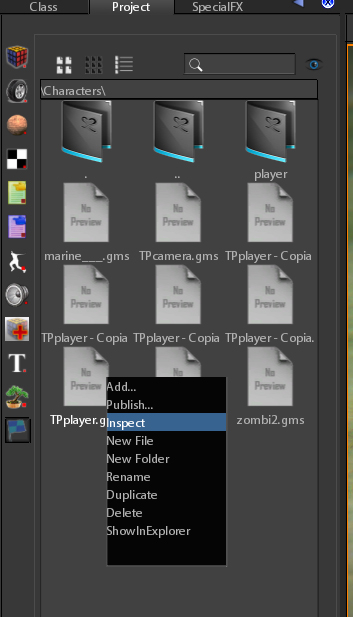
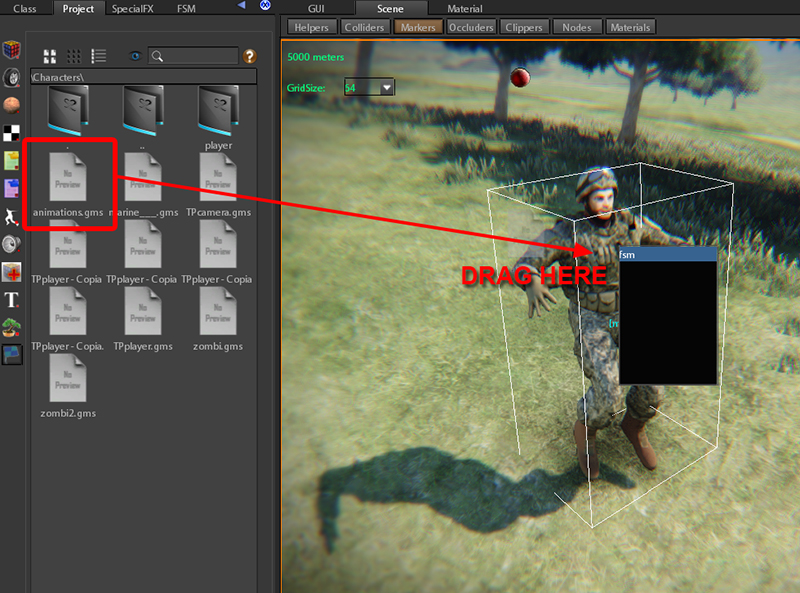
A GameMachine graph is store inside a resource file with extension .gms. All gms files can be accessed via Events browser that is opened by clicking on events icon of the Project tool:
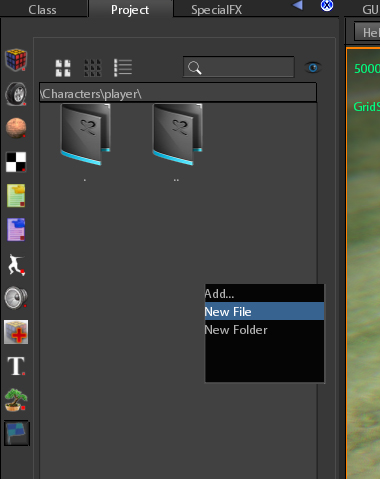
To create a new gms resource click left mouse button on events browser free space and click on new file in the appearing drop down menu:
fsm parameter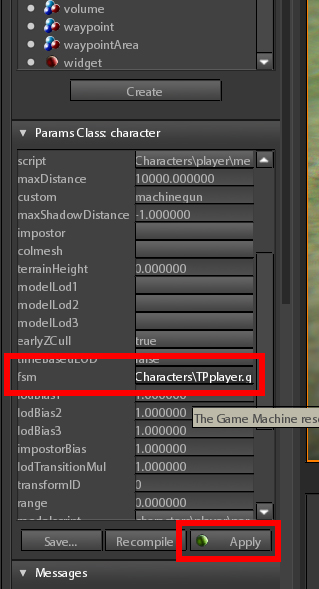
After creating a new GameMachine graph and linked it to an object inside the scene you can edit it by clicking left mouse button on the created file icon and choose Inspect in the appearing drop-down menu
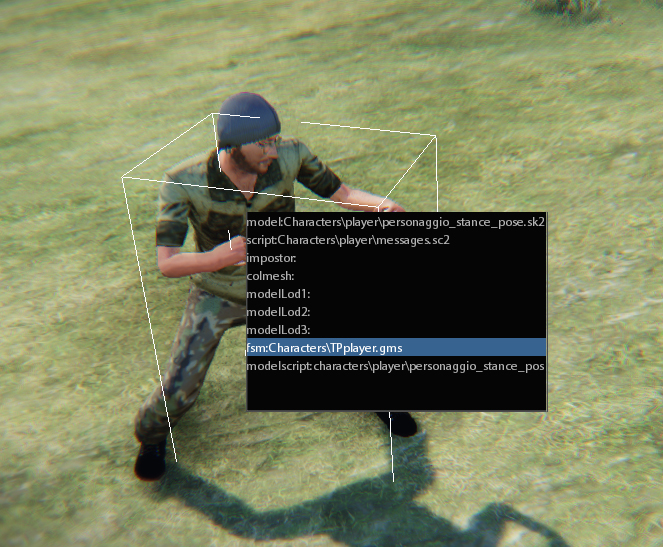
Alternatively you can press left mouse button directly on the selected object inside the scene and choose fsm on the appearing drop-down menu:
The GameMachine tool is composed by two elements:
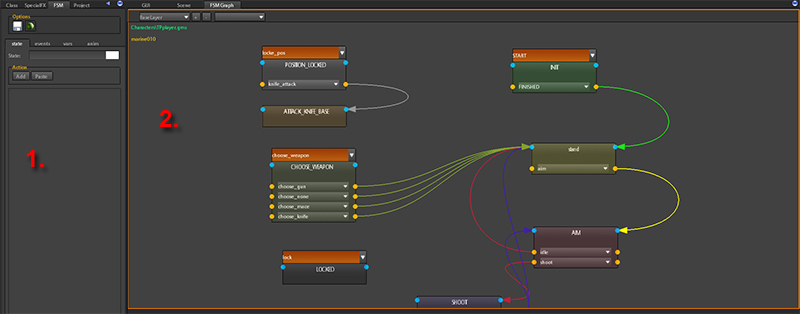
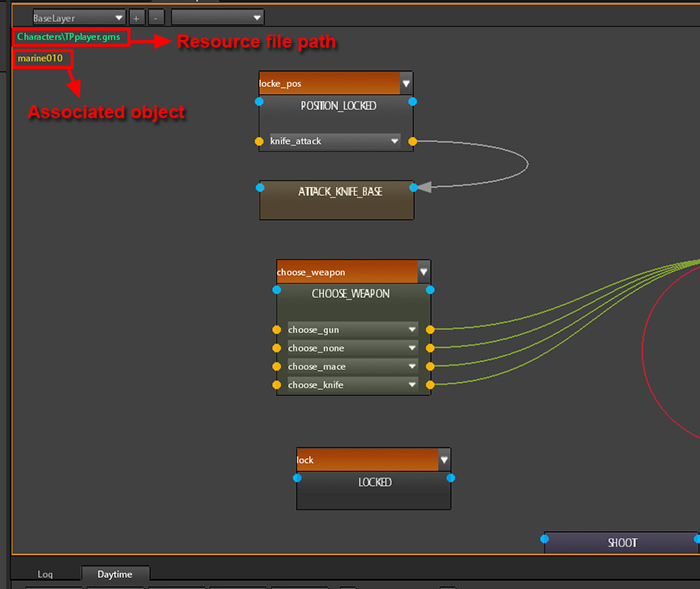
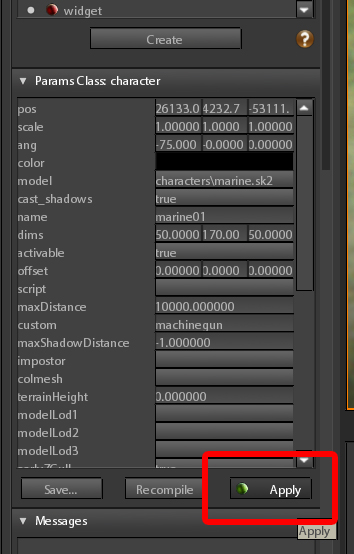
When inspecting a gms file associated with an object inside the scene there are two strings inside the Graph Viewport:
As said Graph Viewport lets you to edit the graph. After some editing graphs can became quite big so they cannot be showed completely inside the viewport, so some input controls have been designed to facilitate graph exploration and editing:
The FSM editor tool has 4 tabs for respectively:
As said Game Machine graphs represent Finite State Machines(FSM). Every node of the GameMachine graph is a state of the FSM, when an event occurs, for example a collision, a transition is generated that makes FSM to pass from the current state to another state, in GameMachine graphs transitions are represented as directional lines connecting nodes. Every frame an object performs a state until an event occurs. Performing a state means executing the set of actions that state contains and/or state animation if exists.
To add a new state press left mouse button on a free space of FSM graph viewport:
A new node of the graph will appear.
To select an existing state click on the respective graph node in the graph viewport, all state data will appear inside the FSM editor state tab:
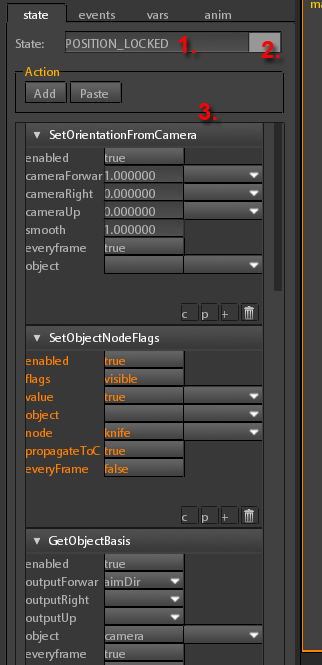
Actions are basic component of a state, they define the behaviour of an object until it remains in that state.
When an object perform a state it just executes, in sequence, all the actions defined in the state. Actions are executed in sequence every frame, unless they have everyframe parameter set to false.
Every action has its own parameters basing on its class.
enabled. This parameter lets you to exclude the action during the simulation.Actions can send events depending on class their belong to. Also actions can output some values to be stored inside variables, variables can be used as input to action parameters depending on variable type, parameter type and action class.
To add a new action to a selected state click on the Add button into the state tab of the FSM editor as showed into the following image:

A new dialog will appear that let you to choose the action to add:
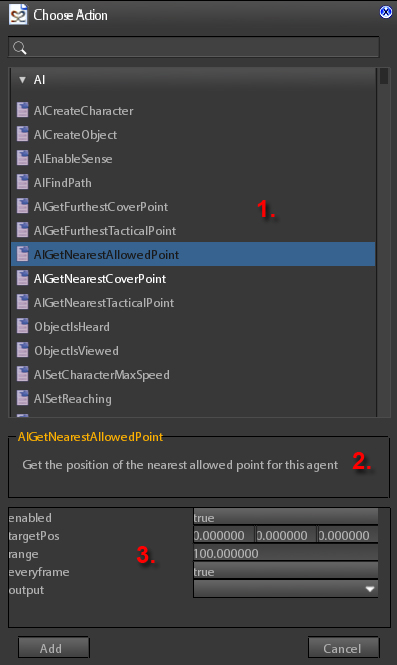
After choosing the action click on Add button to add it. For the complete list of actions see Action Classes
Sometimes it should be necessary to store some action output in order to reuse it inside the same state. This lets you avoiding to create too many states that make Finite State Machine graph growing too much and being too complex. Action output can be store inside variables. Variables can assume values depending on their type:
string float int vec3 bool They can be local and global:
To Add a new variable open the variables tab in the FSM editor and then:
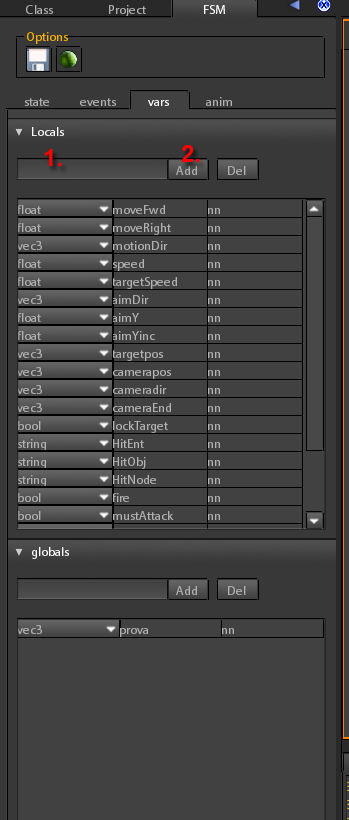
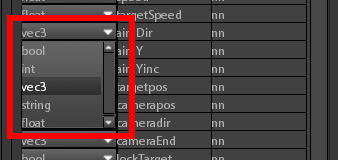
A new variable will appear in the variables list. At start variable is of type bool but you can change type by clicking on the combobox and choose new type as showed into the following image:
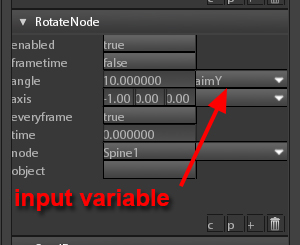
Once you have created a variable you can store a value in it depending on the action. Many actions have output parameters that get in input a variable, they are showed as combobox so you can click on them and choose the variable to assign.
Once you have stored a value inside a variable you can use it as input of another action parameter. Many action parameters have a combobox on the right, this combo is used to store the input variable to be used instead of specifying directly the value to assign:
Events are what FSM needs to change state: when an object is in a state and receives an event it changes state.
How object knows in what is the state to pass to? The answer is: Transitions.
A transition is a couple (event,state) that associates an event that an object can receive and the state in which the object must pass if it receives that event. In other words Transitions define the FSM behaviour, i.e. the new state to be in response to an event basing on previous state.
What means "basing on previous state"?
Transitions are defined for every state, so previous state means the state that contains the transition while new state means the state transition point to. So when object is in a given state it can pass only to states pointed by transitions contained into that current state, this means that for every state only some events produce a transition to another state. The number and type of transitions for every state is the basic of FSM programming.
Events are shared among all FSMs of a game scene.
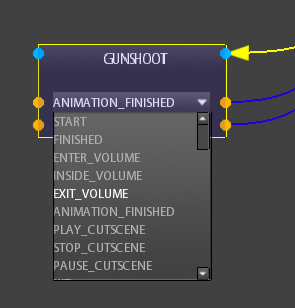
There are some default events that are generated by system, other events can be generated by Animation Keyframes and by Cutscenes, all other events can be generated by Actions. Default system events are the following:
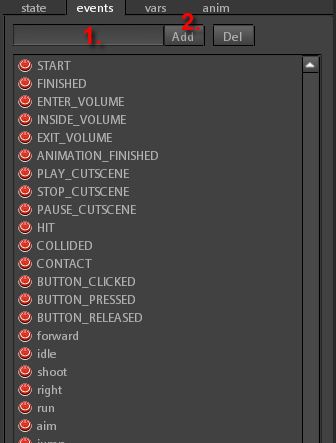
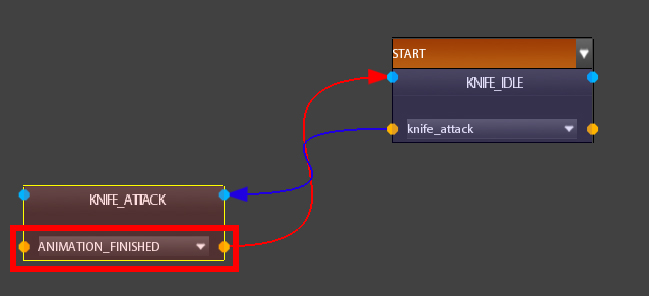
START: This event is generated one time when a FSM startsFINISHED: This event is generated when a state finishes processing. A state finishes when all its actions finish, actions that have everyFrame set to true do not finish. Other actions are temporized, they finish after a given time interval, some other actions finish after one frame they are executed.ENTER_VOLUME: This event is generated when an object enters a volume. The volume must be linked to a trigger.INSIDE_VOLUME EXIT_VOLUME ANIMATION_FINISHED: This event is generated when an animation finish. NOTE that loop animations generate this event every time they reach last framePLAY_CUTSCENE: This event is generated when a cutscene starts playingSTOP_CUTSCENE: This event is generated when a cutscene stops playingPAUSE_CUTSCENE: This event is generated when a cutscene pauses playingHIT: This event is generated when an object is hit by a Projectile or a raycaster or when a RayCast action is performedCOLLIDED CONTACT BUTTON_CLICKED BUTTON_PRESSED BUTTON_RELEASED To Add a new custom event to GameMachine open events tab of FSM editor and then:
To Add a transition to a state press left mouse button on the state node inside the Graph Viewport and select Add Transition in the appearing dropdown menu:
A new combobox will appear in the state node, then select the event which must trigger the transition in the combobox as showed into the following image:
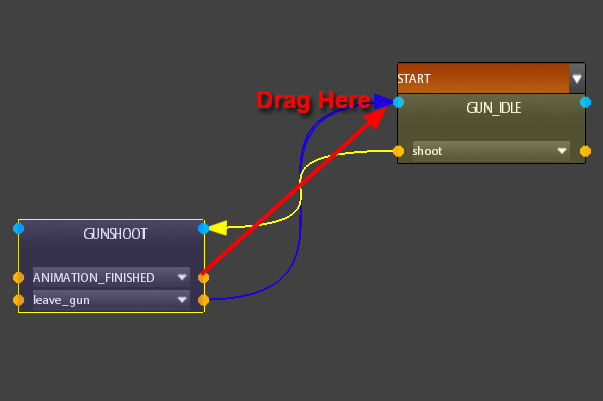
Now you must connect the event to a target state in order to make object pass to the new state when the event occurs. So click on the yellow dot on the transition combobox side and, leaving press end the left mouse button, drag mouse on the blue dot on the side of the target state node you want:
There is a special kind of transition that we call global.
It doesn't need a previous state to work, this means that global transitions can happen in every state, the only condition they depend on is that event they are associated to occurs. A typical example of Global Transition is the transition generated by event START when FSM begins. Thanks to this features Global transitions can help to reduce graph node connections and number of nodes(states) necessary to implement response to an event.
Global Transition are showed as orange comboboxes on top of a state node.

Since global transitions do not depend on a previous state we DO NOT need to define the transition on a state and then connect it to a target state, BUT we must define the global transition directly on the target state.
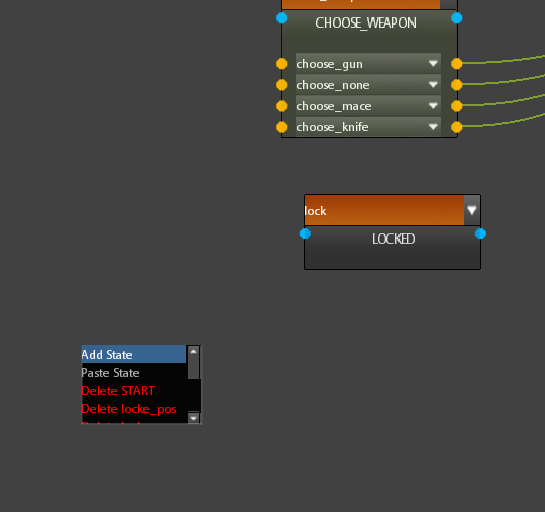
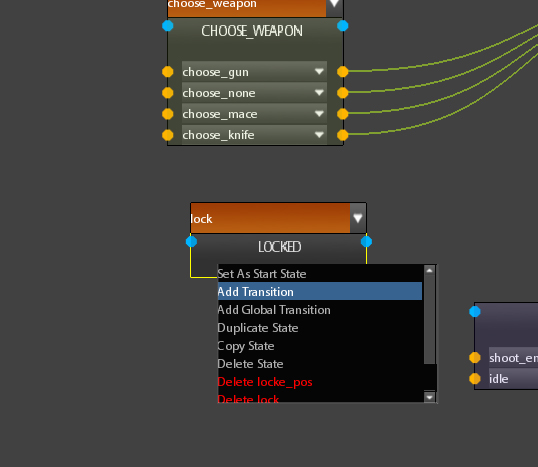
To Add a global transition press right mouse button on the state node we want to be transition target state and choose Add Global Transition on the appearing dropdown menu:
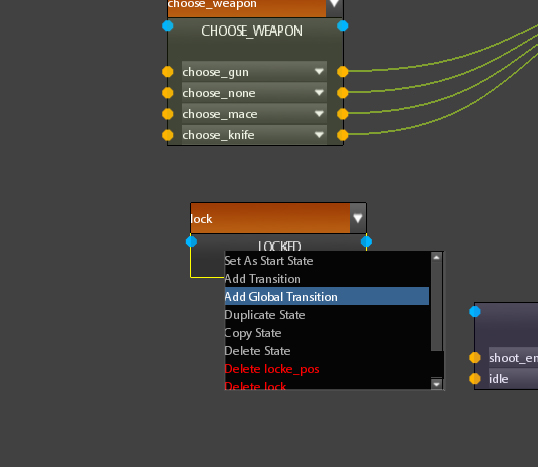
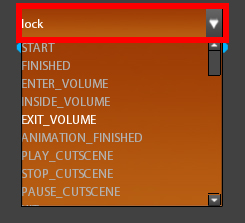
An Orange combobox will appear on the top of the node. Choose the event that must generate the transition using the dropdown menu of the combobox.
LOCKED state isn't connected to any other state, however if lock event occurs the FSM goes to LOCKED state any state it is previously in.GameMachine Finite State Machines are also designed for managing animation transitions.
Every state node of an FSM can play an animation (see also ModelScript and Animations), transition between states correspond to transition (blending) between animations. When a state is associated to an animation, it plays the animation when starts and when animation finishes it fires an ANIMATION_FINISHED event, so you can define a transition to another state that is processed when this event occurs:
When you link a gms resource to an object inside the scene, and this object owns a modelscript (see Models) FSM automatically has access to all animations defined for that object. To associate an animation to a state:
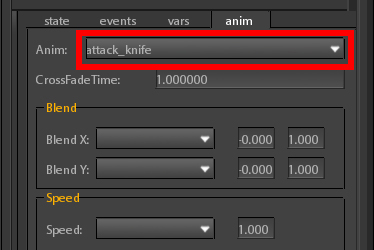
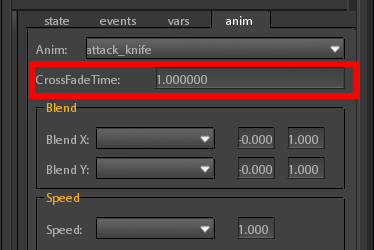
You can also set how much time the transition from the animation of current state to animation of another state must take, by setting the CrossFade time.
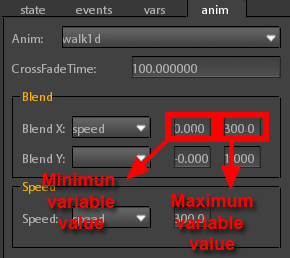
If animation associated to the state is of type 1D/2D Blended animations 1D/2D Blended there are some other settings you must take care of.
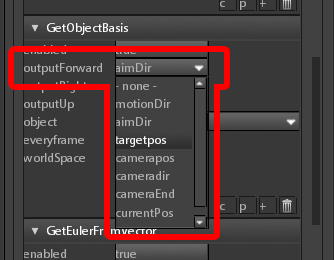
As said 1D/2D Blended animations are special kind of animation owning more that one simple animation inside, they can blend between contained animations basing on input float values inside the [0,1] range.
These float parameters are taken from FSM variables, so you can control animation blending basing on the value of a variable.
The combobox lets you to specify what variable must use to obtain blend value as showed into the following image:
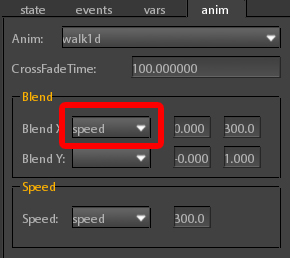
1D/2D Blended animations works inside [0,1] range but, usually, variables could assume values inside greater intervals, so you must specify what is the range in which variable assume values in order to make system transform this interval into the [0,1].
The concept of FSM Layers is strictly associated to the concept of Animation Channels. Just as Animation Channels FSM layers are superimposed layers that works independently.
At a lower level every FSM Layer owns an animation channel, so animations belonging to different layers are blended in the same way as they belong to different channels.
To Add a new layer into the FSM click on + button in the FSM Graph viewport as showed into the following image:
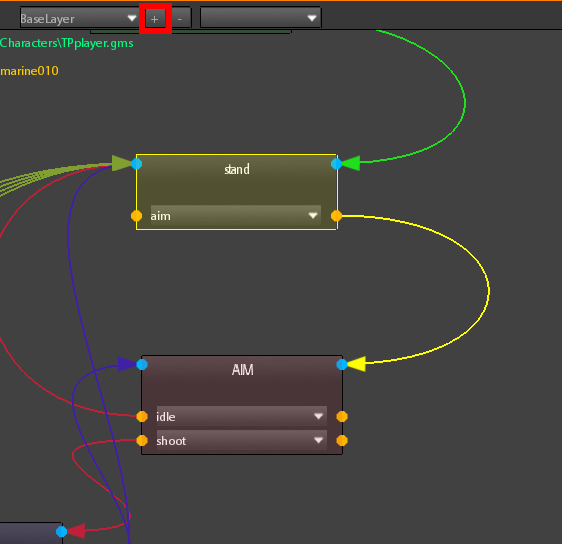
A new layer dialog appears and lets you to insert a name for the new layer. Once a new layer is created you can show it by selecting its name into the layers combobox as showed in the following image:
When a layer is selected it is showed in the FSM Graph Viewport, so you can edit it.
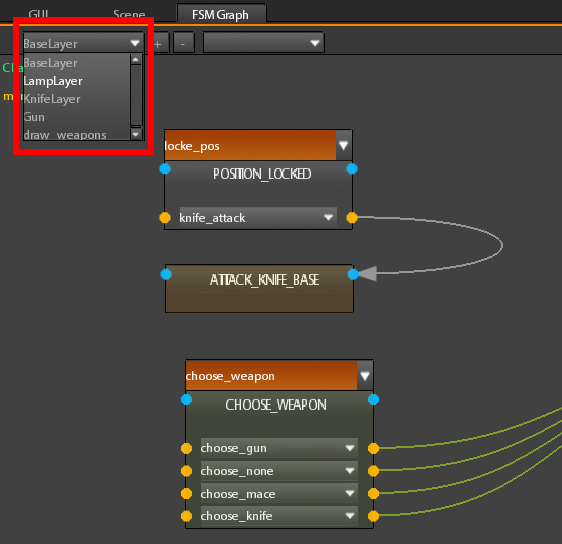
If the modelscript of the object associated to the FSM contains an Channel mask you can apply it to the selected layer, in this way all animations played in that layer will be masked just as described in Channel mask.
To Associate a mask to the selected layer you must select it from the combobox on the right of layers combobox, as showed in the following image:

As said animations CrossFade is performed between states belonging to the same layer. Between different Layers animation blending is performed using channel blending (see Animation Channels).
When you select a state belonging to a layer on top of baseLayer a new group of parameters, channel group, appears into the anim tab of the FSM editor:
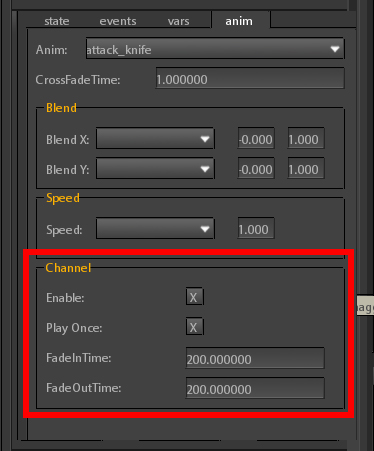
This group of parameters lets you to decide how the animation channel of the FSM layer must be blended.
Enable: animation channel must be enabled for this state? If no, no animations are played.PlayOnce: the channel animation must be stopped when finishes (no loop)FadeInTime: duration of the FadeIn channel transition, in millisecondsFadeOutTime: duration of the FadeOut channel transition, in millisecondsTo better understand How game Machine works with animations and layers we show an example similar to that showed in Scripting Animations.
We use the same marine model and modelscript as in Scripting Animations sample.
idle run aim draw_gun 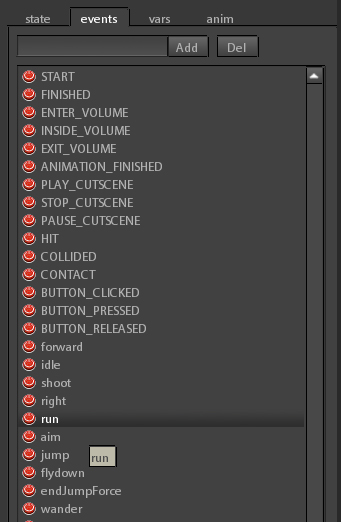
STANDBY WALK START to STANDBY staterun to STANDBY stateidle to WALK staterun transition to STANDBY stateidle transition to WALK stateSTANDBY statestandby animation and write 100 in the CrossFadeTime inputboxù 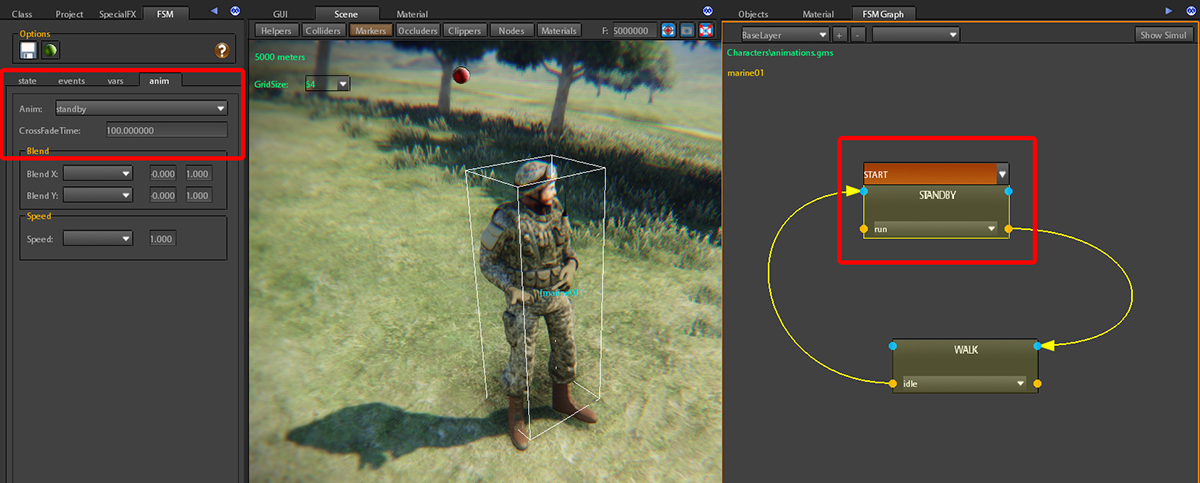
WALK statewalk animation and write 100 in the CrossFadeTime inputbox 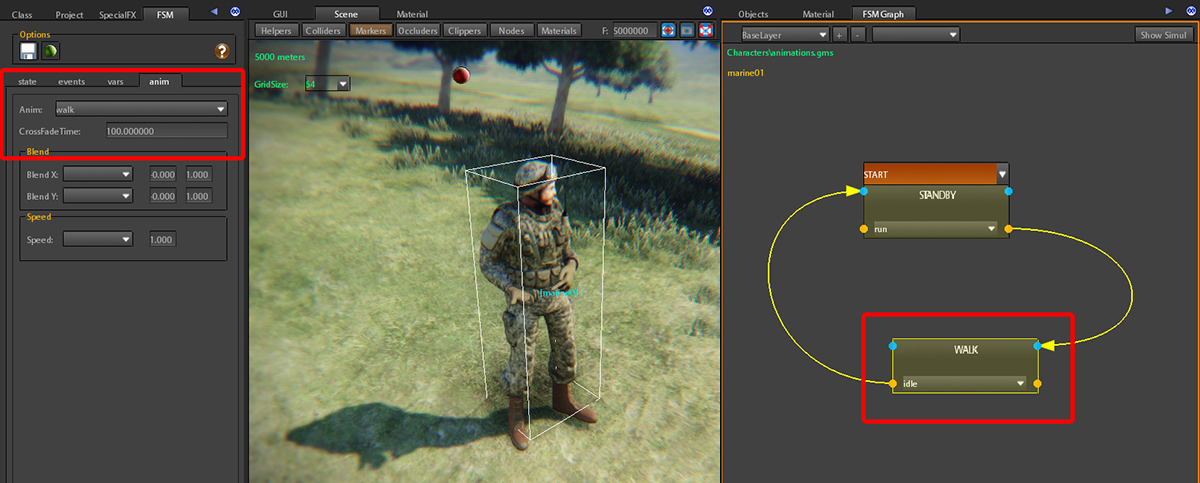
AIM_STAND AIM START to AIM_STAND stateaim to AIM_STAND statedraw_gun to AIM stateaim transition to AIM statedraw_gun transition to AIM_STAND stateAIM_STAND state200 in the FadeOutTime inputbox of the channel group. 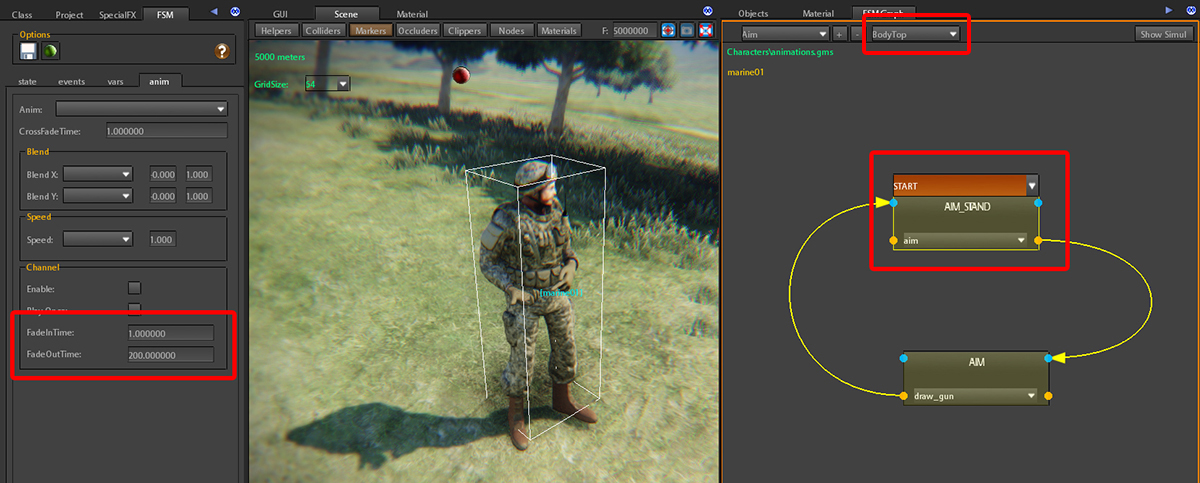
aim layer. Also note the channel isn't enabled. AIM state200 in the FadeInTime inputbox of the channel group. 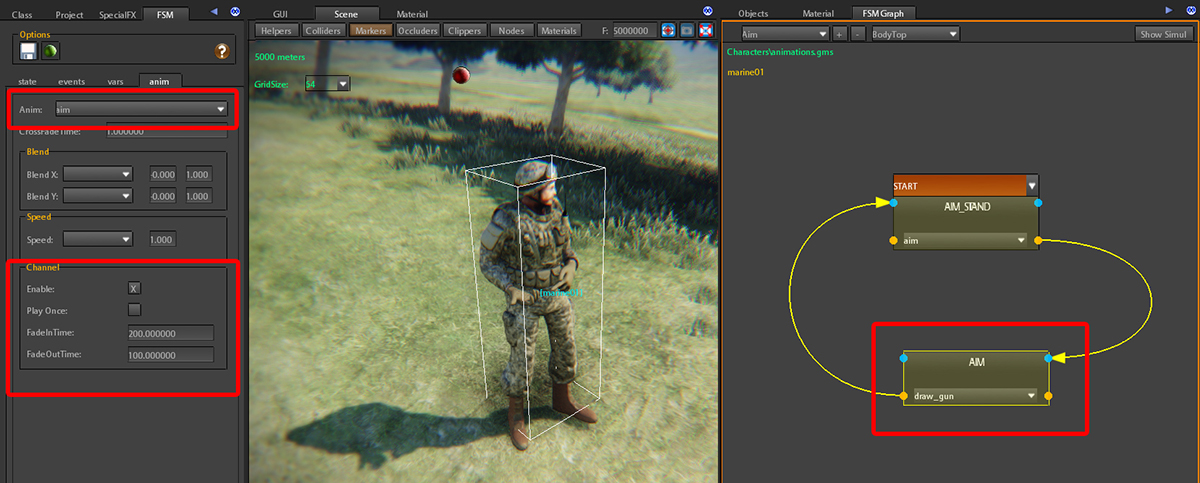
AIM state is used for smoothly fade in the aim animation channel of the aim layer onto the underlying baseLayer channel. 
 1.8.10
